
How Lash Lifts Work: A Step-by-Step Guide to the Lash Lift Process
- Lucy Enkh

- 9 hours ago
- 4 min read
If you’ve ever wondered how to get those perfectly curled, natural-looking lashes without the hassle of daily curling or mascara, a lash lift might just be your new best friend. I’m excited to share everything you need to know about the lash lift process, from start to finish. This beauty treatment has become a favorite for many because it enhances your natural lashes, making your eyes pop with minimal effort.
Let’s dive into the details and explore how this simple yet effective treatment can transform your look.
Understanding the Lash Lift Process
The lash lift process is a semi-permanent treatment designed to curl and lift your natural lashes from the base. Unlike eyelash extensions, which add synthetic lashes, a lash lift works with what you already have. The result? Longer, fuller-looking lashes that last for weeks.
Here’s a quick overview of the steps involved:
Preparation: Your lashes are cleaned to remove oils and makeup.
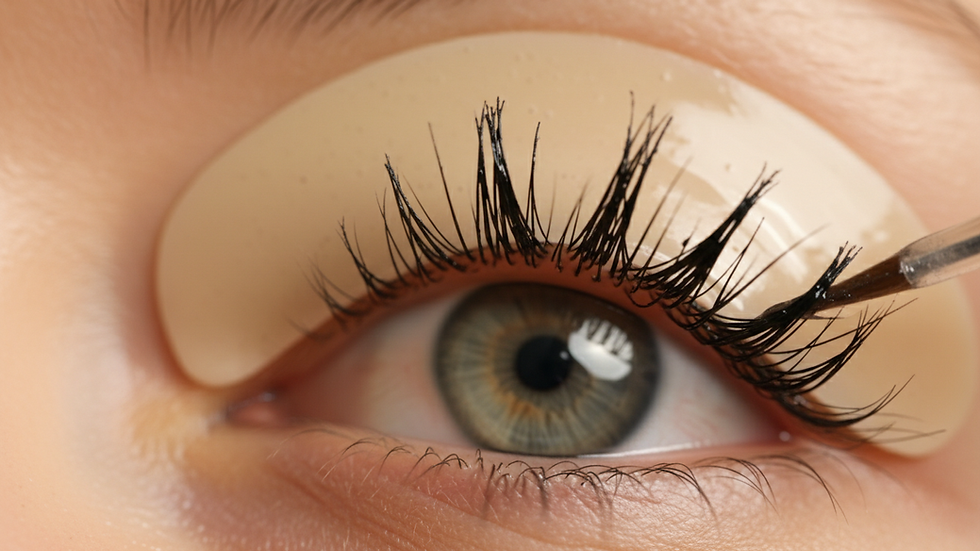
Shield Placement: A silicone shield is placed on your eyelid to shape the curl.
Lifting Solution: A gentle perming lotion is applied to soften the lashes.
Setting Solution: This locks the lashes into their new shape.
Tinting (optional): Many choose to tint their lashes for added definition.
Nourishing: A conditioning serum is applied to keep lashes healthy.
Each step is carefully timed and customized to your lash type to ensure the best results.
Step-by-Step: What Happens During Your Lash Lift Appointment
Now, let me walk you through the lash lift process in more detail. Knowing what to expect can make the experience more relaxing and enjoyable.
Step 1: Cleansing Your Lashes
Your technician will start by thoroughly cleaning your lashes. This removes any makeup, oils, or dirt that could interfere with the lifting solution. Clean lashes ensure the products work effectively and last longer.
Step 2: Applying the Silicone Shield
Next, a small silicone shield is carefully placed on your eyelid, close to the lash line. This shield acts as a mold to shape your lashes into a beautiful curl. The size of the shield can vary depending on how dramatic or natural you want your lift to look.
Step 3: Lifting Solution Application
The lifting solution is applied to your lashes while they rest on the silicone shield. This solution softens the hair structure, allowing your lashes to be reshaped. It’s left on for about 10-15 minutes, depending on your lash type.
Step 4: Setting the Curl
After the lifting solution, a setting lotion is applied. This step locks your lashes into their new curled shape. It usually takes another 10-15 minutes to set properly.
Step 5: Optional Tinting
If you want your lashes to look even more defined, a tint can be applied. This is especially popular for those with lighter lashes or anyone who wants to skip mascara altogether. The tint darkens your lashes, making them appear thicker and more noticeable.
Step 6: Conditioning Treatment
Finally, a nourishing serum is applied to hydrate and strengthen your lashes. This helps keep them healthy and looking their best after the treatment.
The entire appointment usually takes about 45 minutes to an hour. It’s a relaxing experience, and many find it a great way to pamper themselves.
What are the Negatives of a Lash Lift?
While lash lifts are fantastic for enhancing your natural beauty, it’s important to be aware of some potential downsides before booking your appointment.
Sensitivity or Allergic Reactions: Some people may experience irritation or allergic reactions to the lifting solutions. It’s a good idea to do a patch test before your appointment.
Not Suitable for Very Short or Sparse Lashes: If your lashes are extremely short or thin, a lash lift might not give the desired effect.
Temporary Results: The lift lasts about 6-8 weeks, so you’ll need regular touch-ups to maintain the look.
Avoid Water and Makeup for 24 Hours: After the treatment, you must avoid getting your lashes wet or applying eye makeup for at least 24 hours to ensure the lift sets properly.
Potential Lash Damage: If done incorrectly or too frequently, the chemicals can weaken your lashes over time.
Despite these considerations, many find the benefits far outweigh the negatives when done by a skilled professional.
How to Care for Your Lashes After a Lift
Taking care of your lashes post-lift is key to prolonging the results and keeping your lashes healthy. Here are some simple tips I always recommend:
Avoid Water and Steam for 24 Hours: This helps the lift set fully.
Skip Oil-Based Products: Oils can break down the lifting solution, so avoid oil-based makeup removers or creams around your eyes.
Be Gentle: Avoid rubbing your eyes or using eyelash curlers.
Use a Lash Serum: Applying a nourishing serum can strengthen your lashes and promote growth.
Regular Touch-Ups: Schedule your next lift every 6-8 weeks to keep your lashes looking fresh.
By following these tips, you’ll enjoy your lifted lashes longer and keep them looking their best.

Why I Love Lash Lifts and You Might Too
I’ve tried many lash-enhancing methods, but lash lifts stand out for their natural, low-maintenance beauty. They save time in my daily routine and give my eyes a bright, wide-awake look without any extra effort.
If you’re curious about how does a lash lift work, now you have a clear picture of the process. It’s a gentle, effective way to boost your natural lashes and feel confident every day.
Whether you want a subtle enhancement or a more dramatic curl, a lash lift can be tailored to your style. Plus, with proper care, the results last long enough to make it worth the investment.
If you’re in the DMV area, Laveda Lash & Brow is a fantastic place to experience this treatment. Their expert technicians ensure you get the best results in a comfortable, welcoming environment.
Ready to give your lashes a lift? It’s time to book your appointment and enjoy the beauty of naturally lifted lashes!


Comments